Using the GTK Inspector in GNOME Boxes
The GTK Inspector is a powerful tool that allows developers to better
understand how the code is “mapped” to the user interface of a GTK application.
It can usually be activated using the keyboard shortcut Ctrl + Shift + i, but
that isn’t working on GNOME Boxes. Although I’ve made an
attempt to
fix this issue, changes to GNOME Boxes can a long time to land because it
follows the release schedule of GNOME (about once every six months).
Considering this, I’ve put together this guide to use the GTK Inspector in
GNOME Boxes in its current state.
Method 1: enviroment variable
Setting the environment variable GTK_DEBUG to interactive upon launching
GNOME Boxes (or any GTK application!) will launch the GTK Inspector alongside
it.
If you installed Boxes using a package provided by your distribution run:
GTK_DEBUG=interactive gnome-boxes
If you installed GNOME Boxes as a flatpak, run:
GTK_DEBUG=interactive flatpak run org.gnome.Boxes
However, if you want to use the GTK Inspector with your own build of GNOME Boxes, you should probably use one of the following methods.
Method 2: toggle option in Builder
On the most recent versions of GNOME Builder you can launch the inpector alongside the application you are compiling by simply toggling an option on the run menu, as you can see below:
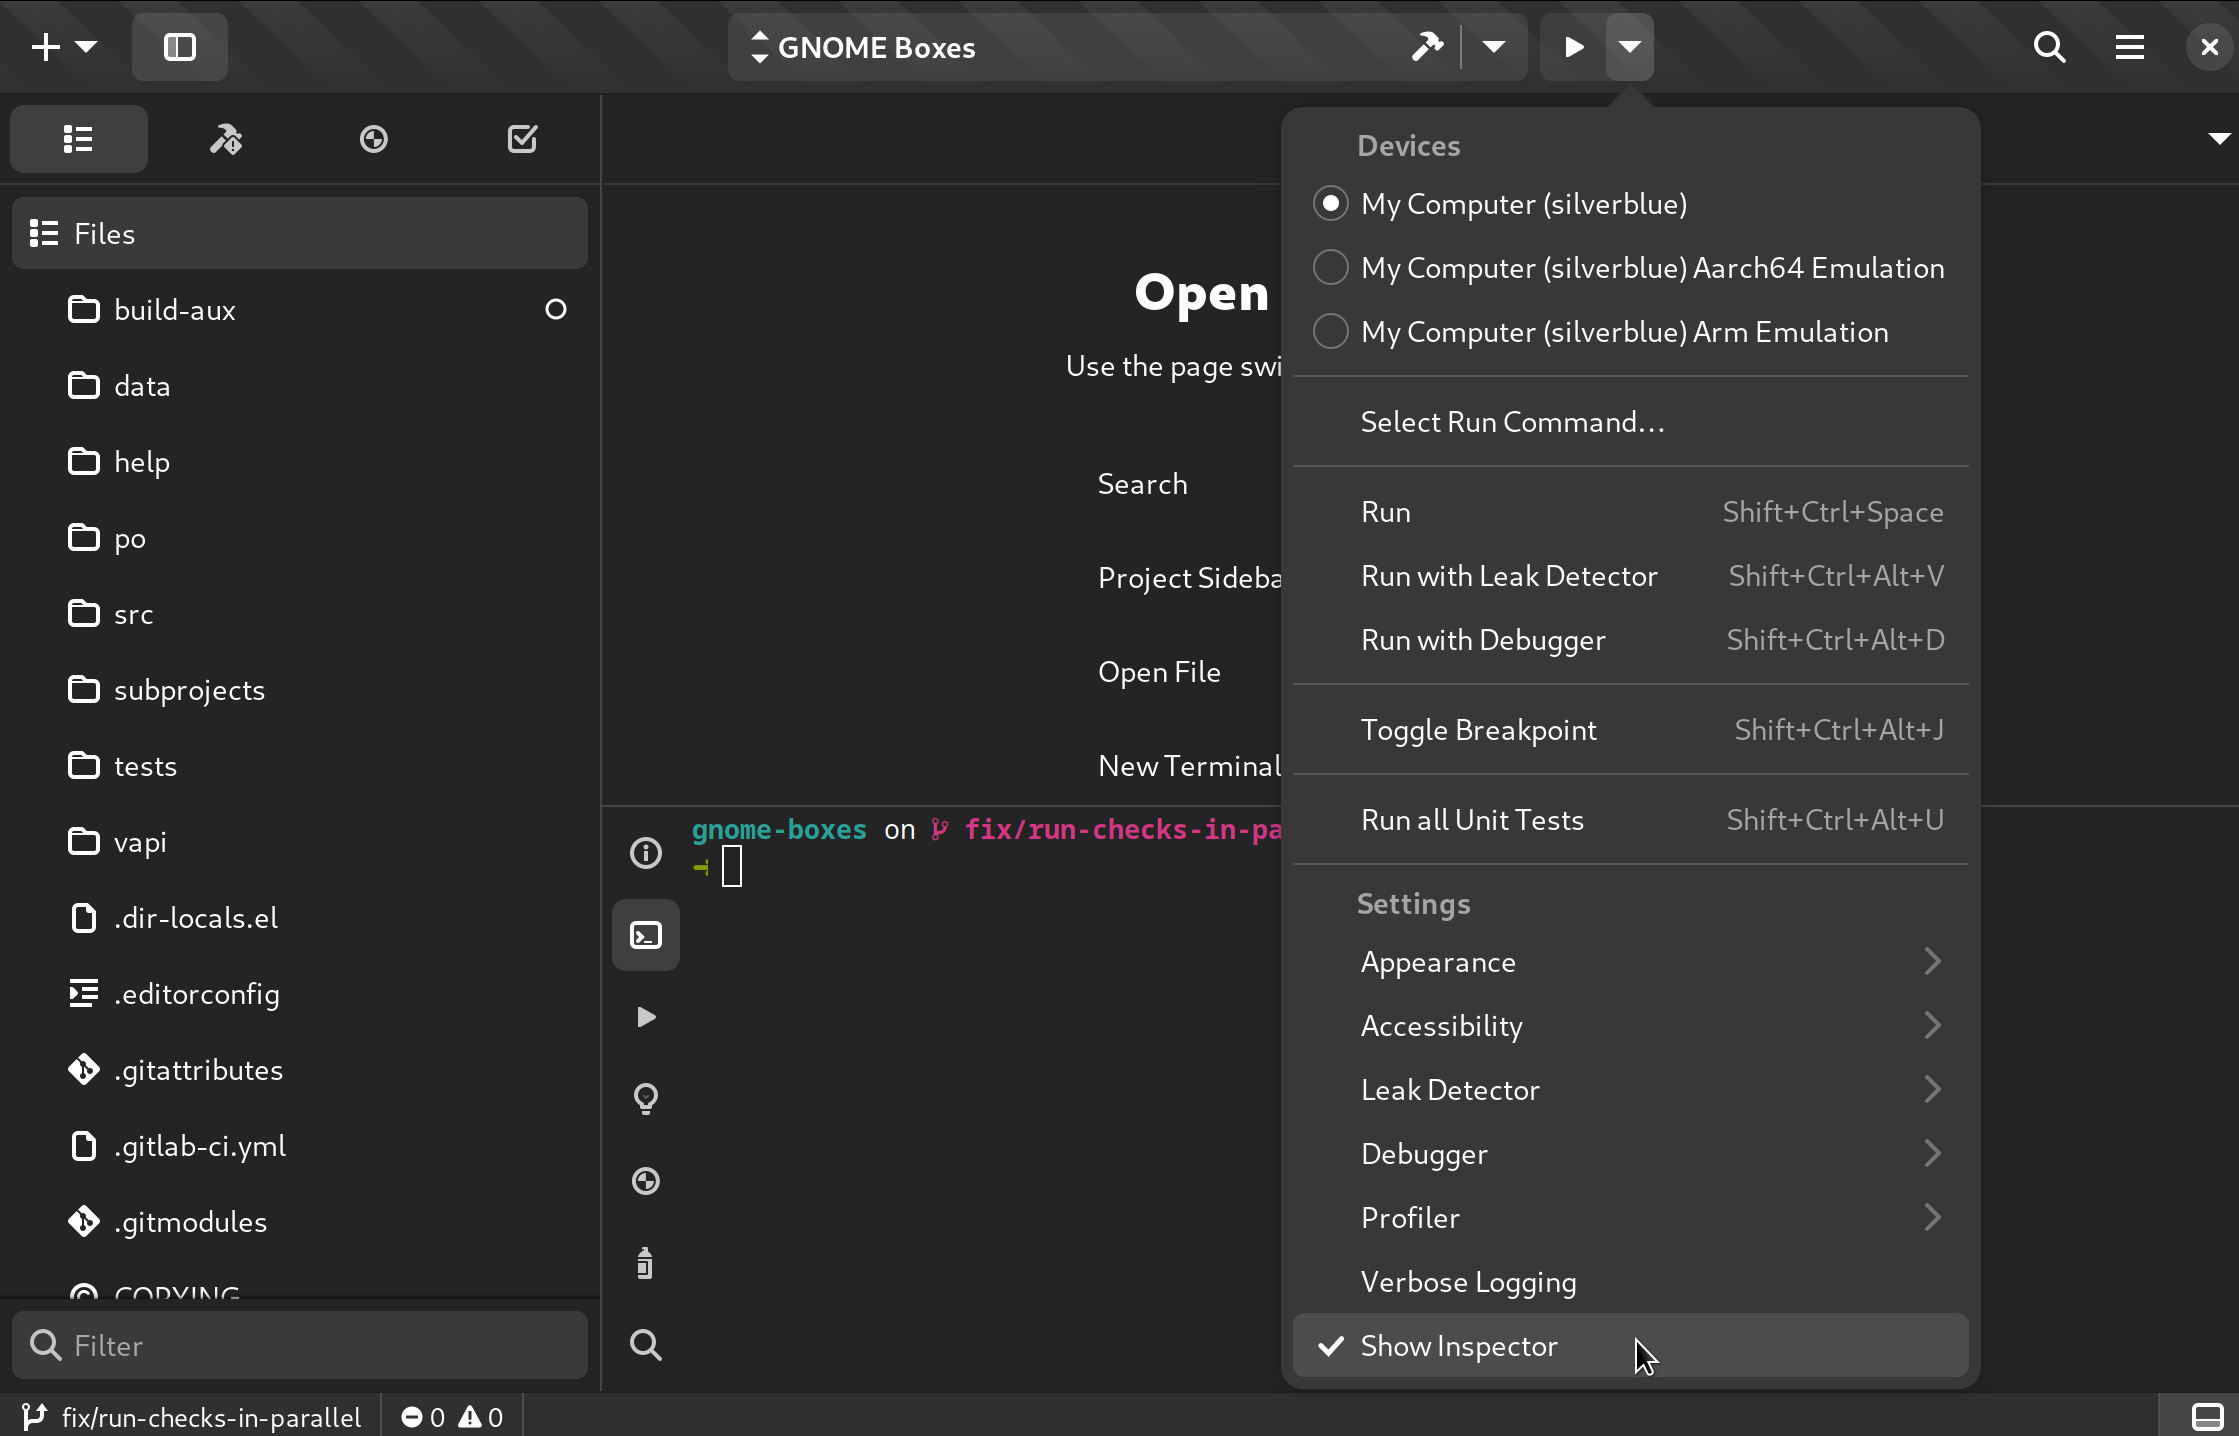
This will take care of everything for you (thanks GNOME Builder!).
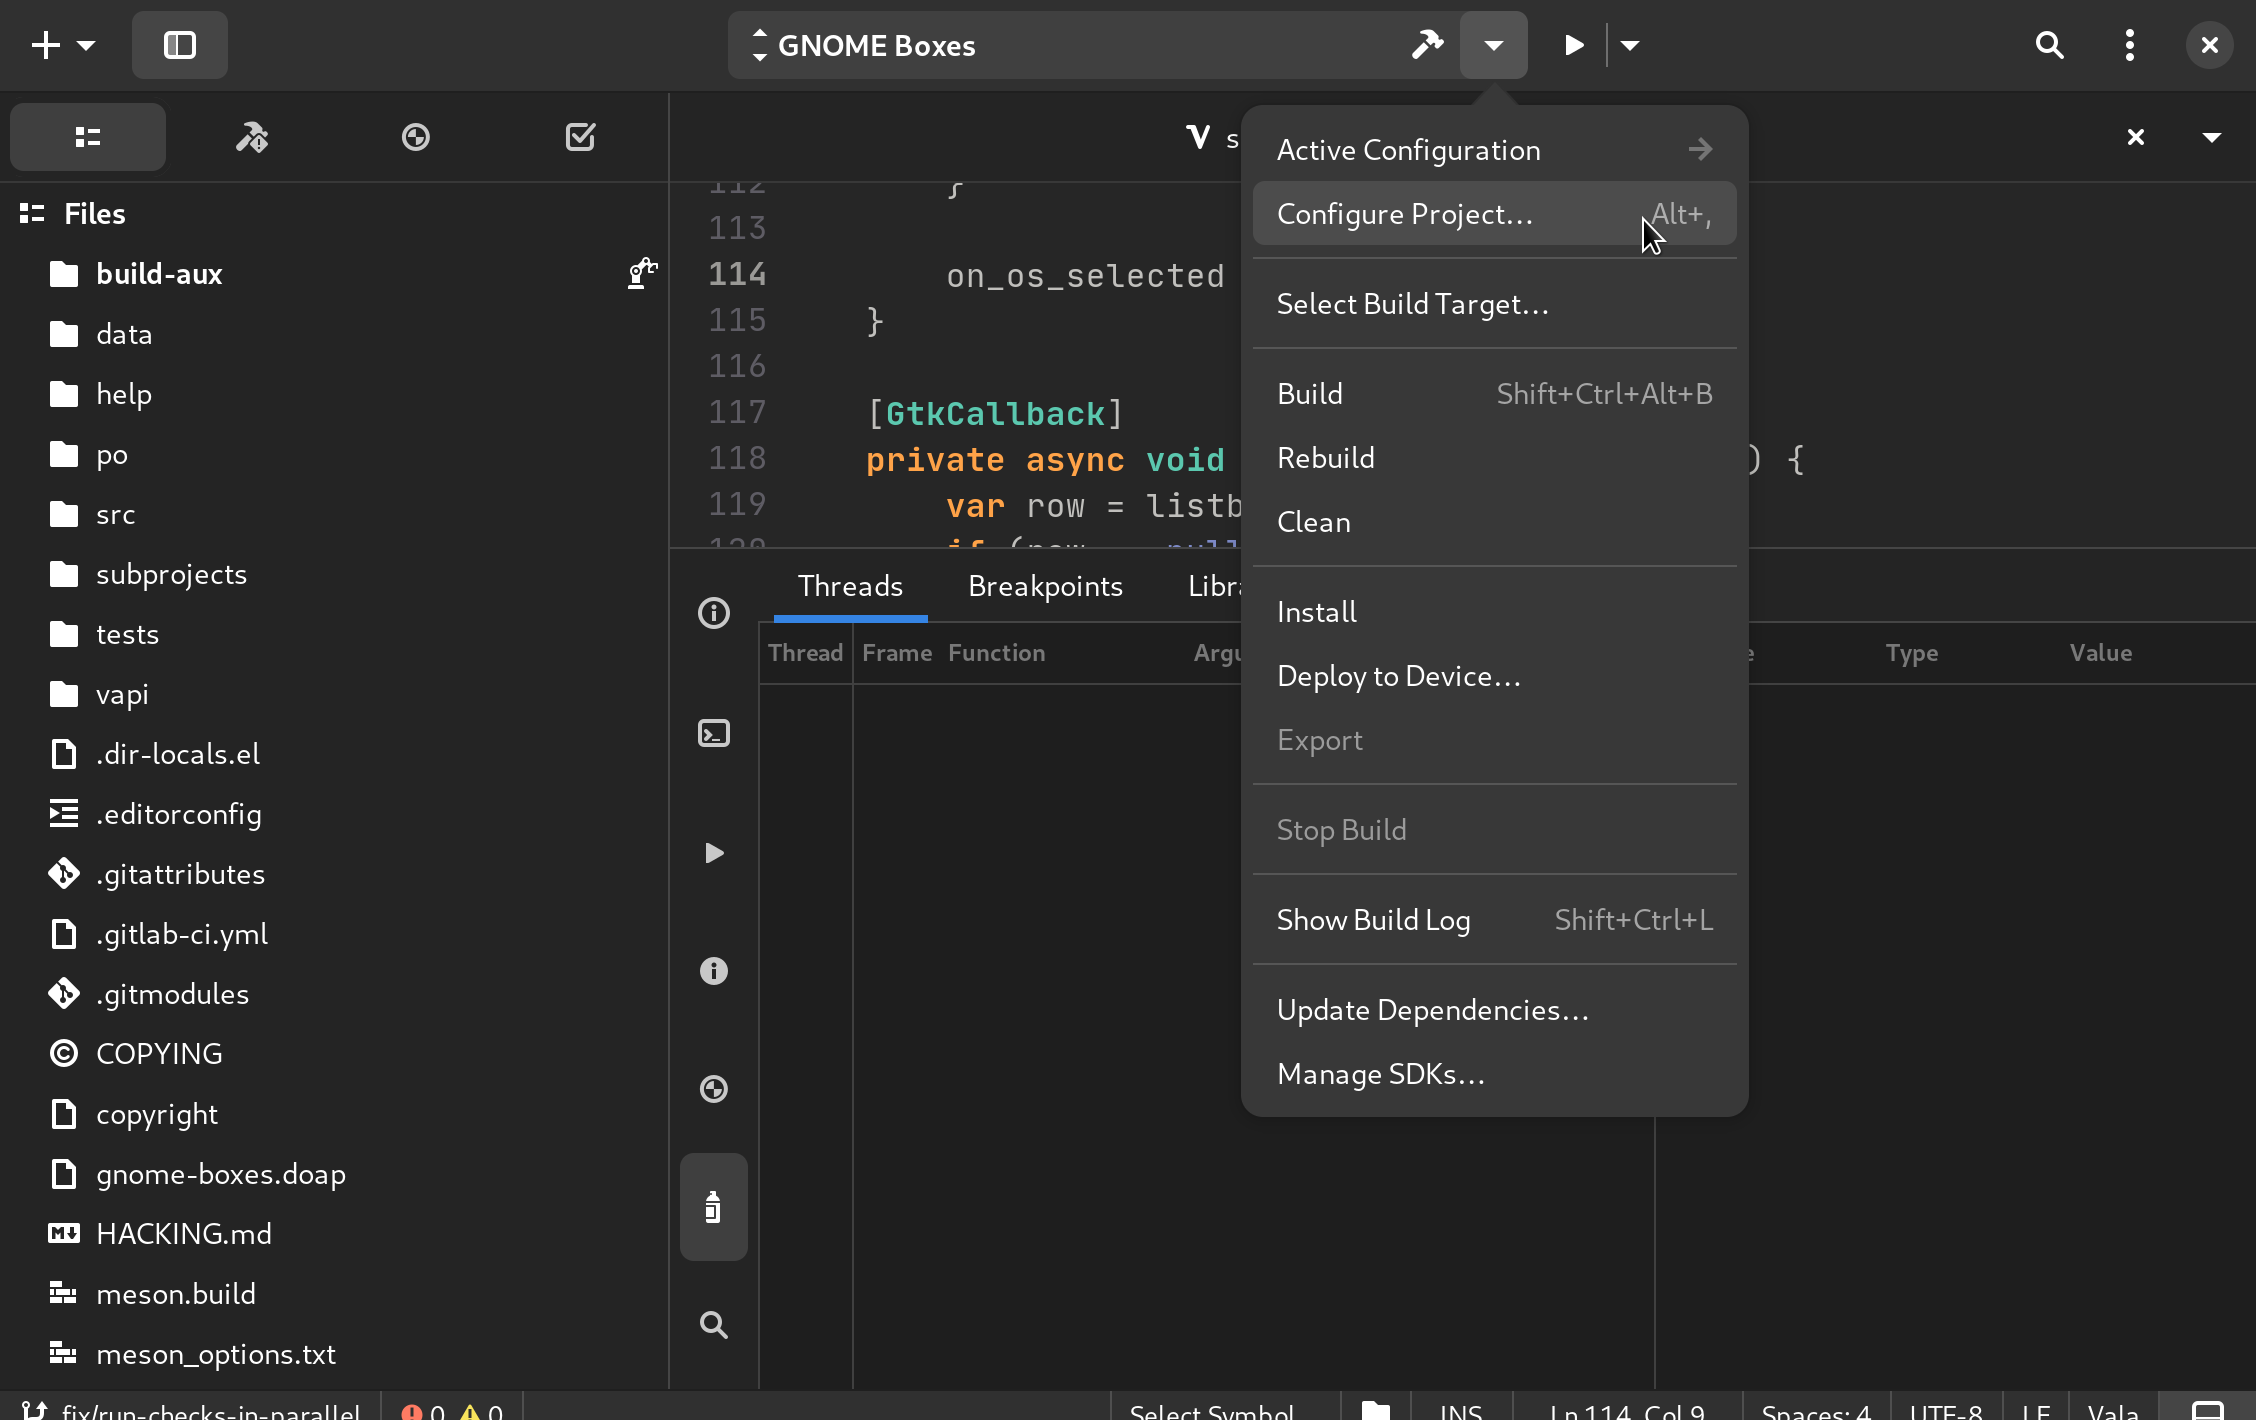
Method 3: project configuration in Builder
If your version of GNOME Builder does not have the feature mentioned above yet,
don’t worry there’s still hope! First, head to the project configuration page
by hitting Alt + , or clicking the “Configure Project…” option in the
dropdown menu of the omnibar:
Then, append GTK_DEBUG=interactive under the “Configure Options” text box:
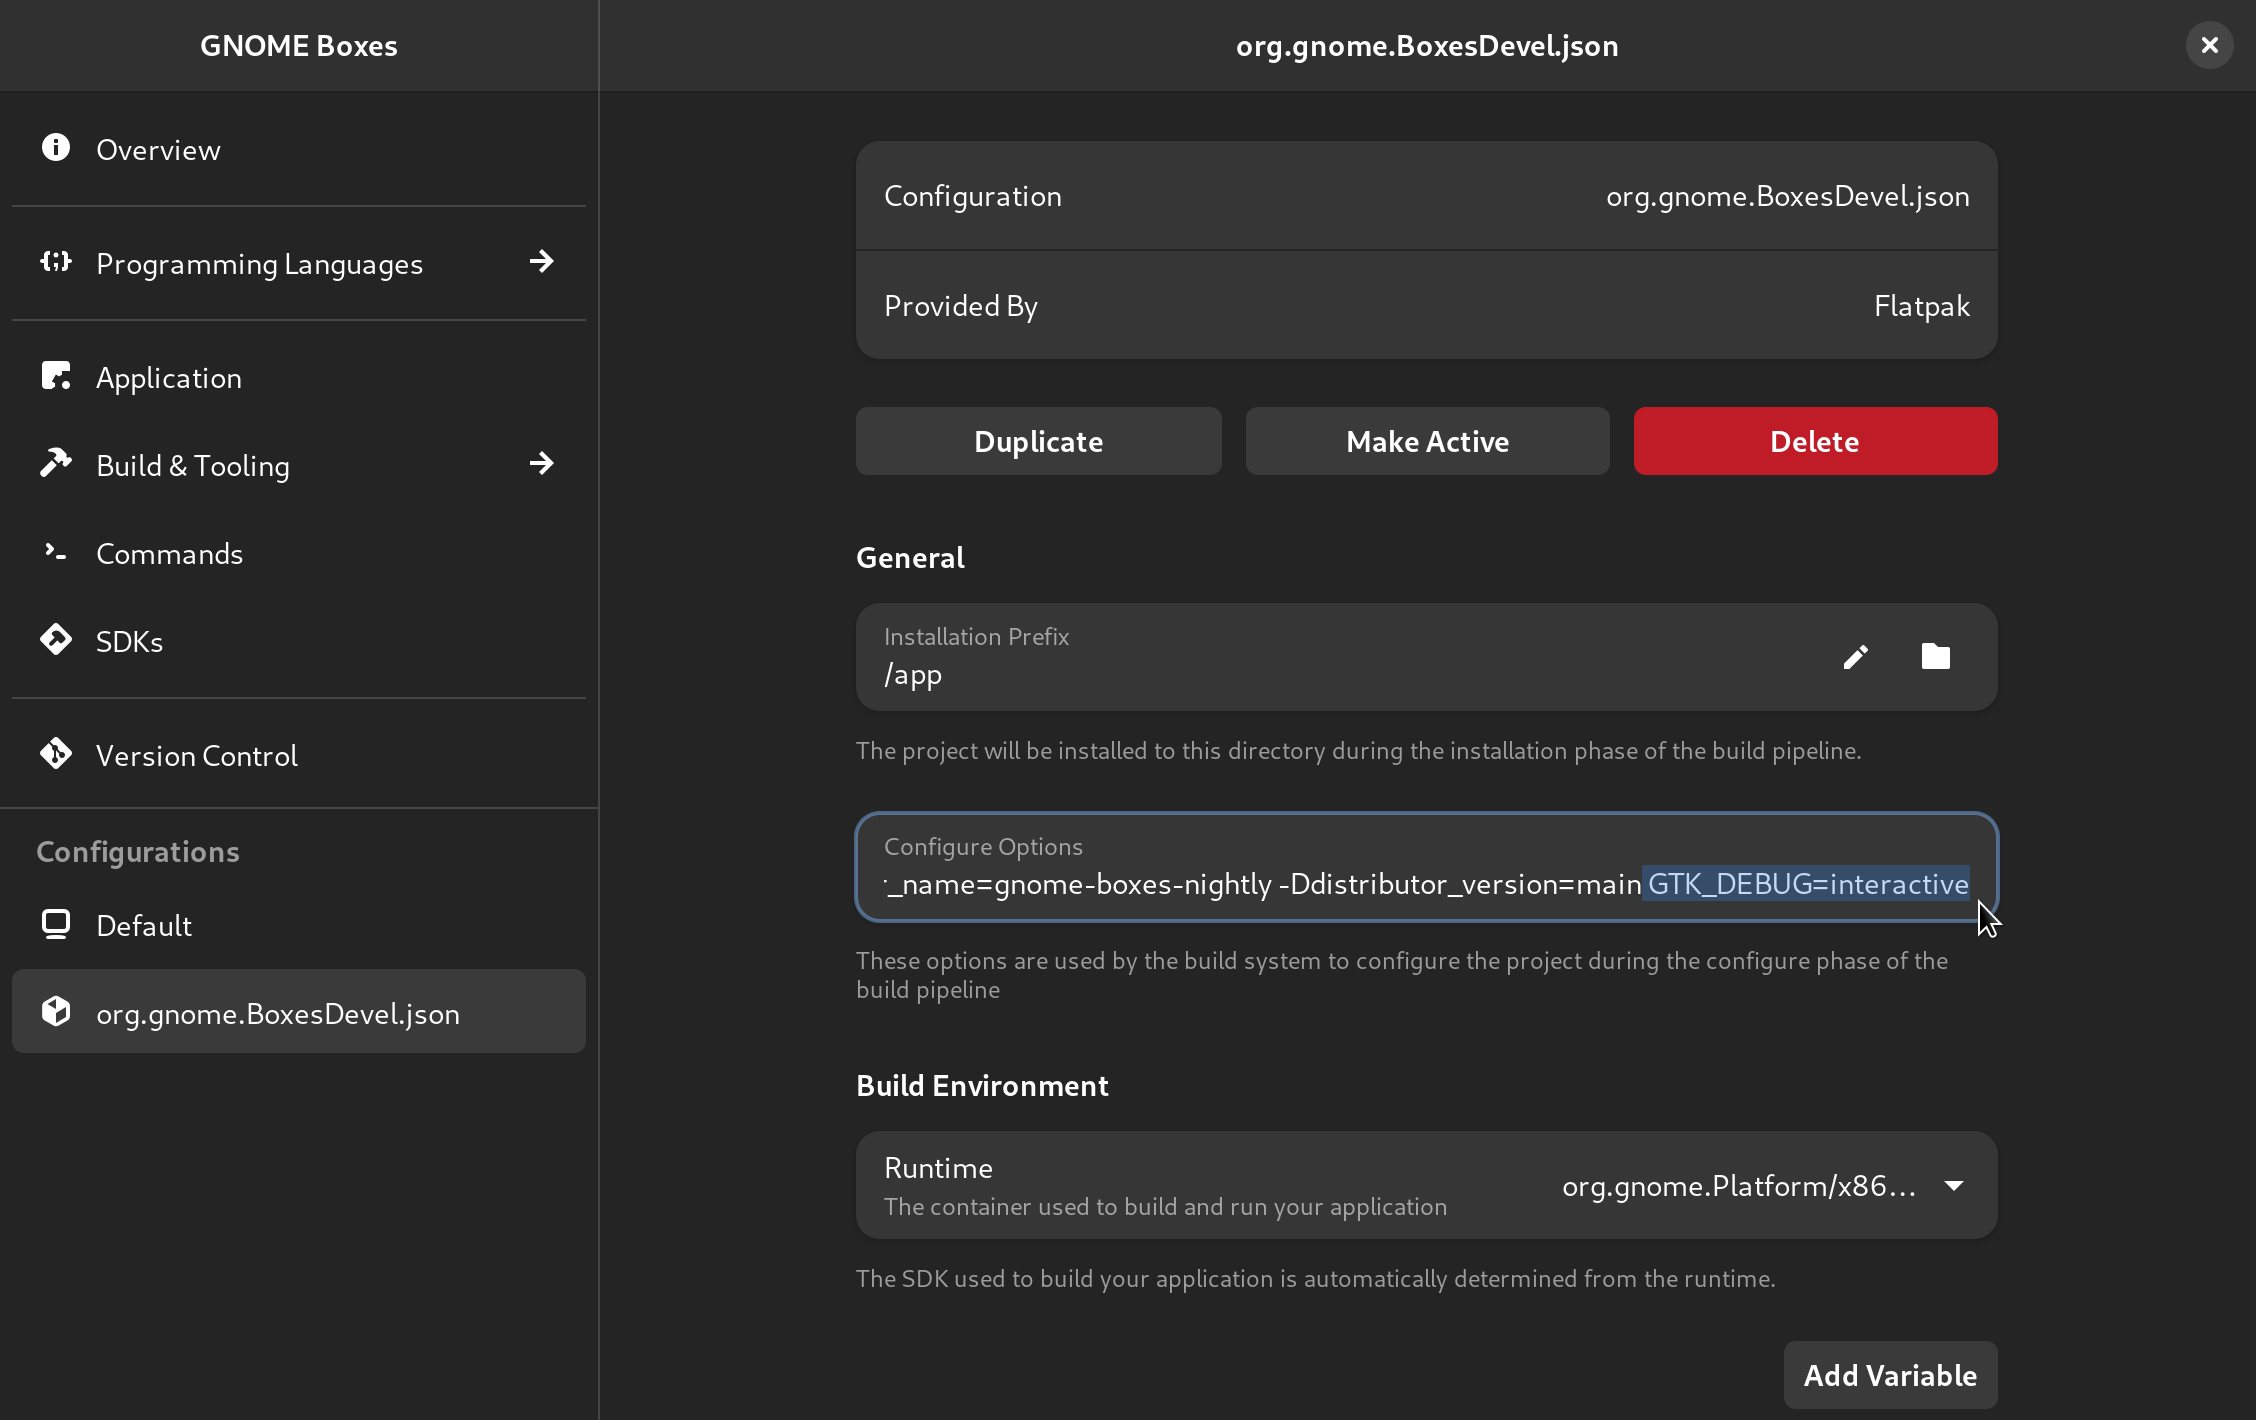
What we did here was changing the flatpak manifest of GNOME Boxes using a nice
graphical user interface (thanks GNOME Builder!). Since you would want to keep
our changes to that file to yourself, you should tell git to ignore it. Using
.gitignore is no-go because the .gitignore file itself is being tracked by
git. Instead we should add the path of the flatpak manifest to
.git/info/exclude, so git will ignore it locally, like so:
echo "build-aux/flatpak/org.gnome.BoxesDevel.json" > .git/info/exclude
git update-index --assume-unchanged build-aux/flatpak/org.gnome.BoxesDevel.json
Later, if you want to make a contribution that involves changing the flatpak
manifest, remove the line that contains build-aux/flatpak/org.gnome.BoxesDevel.json
from .git/info/exclude and run:
git update-index --no-assume-unchanged build-aux/flatpak/org.gnome.BoxesDevel.json
Method 4: export package in Builder
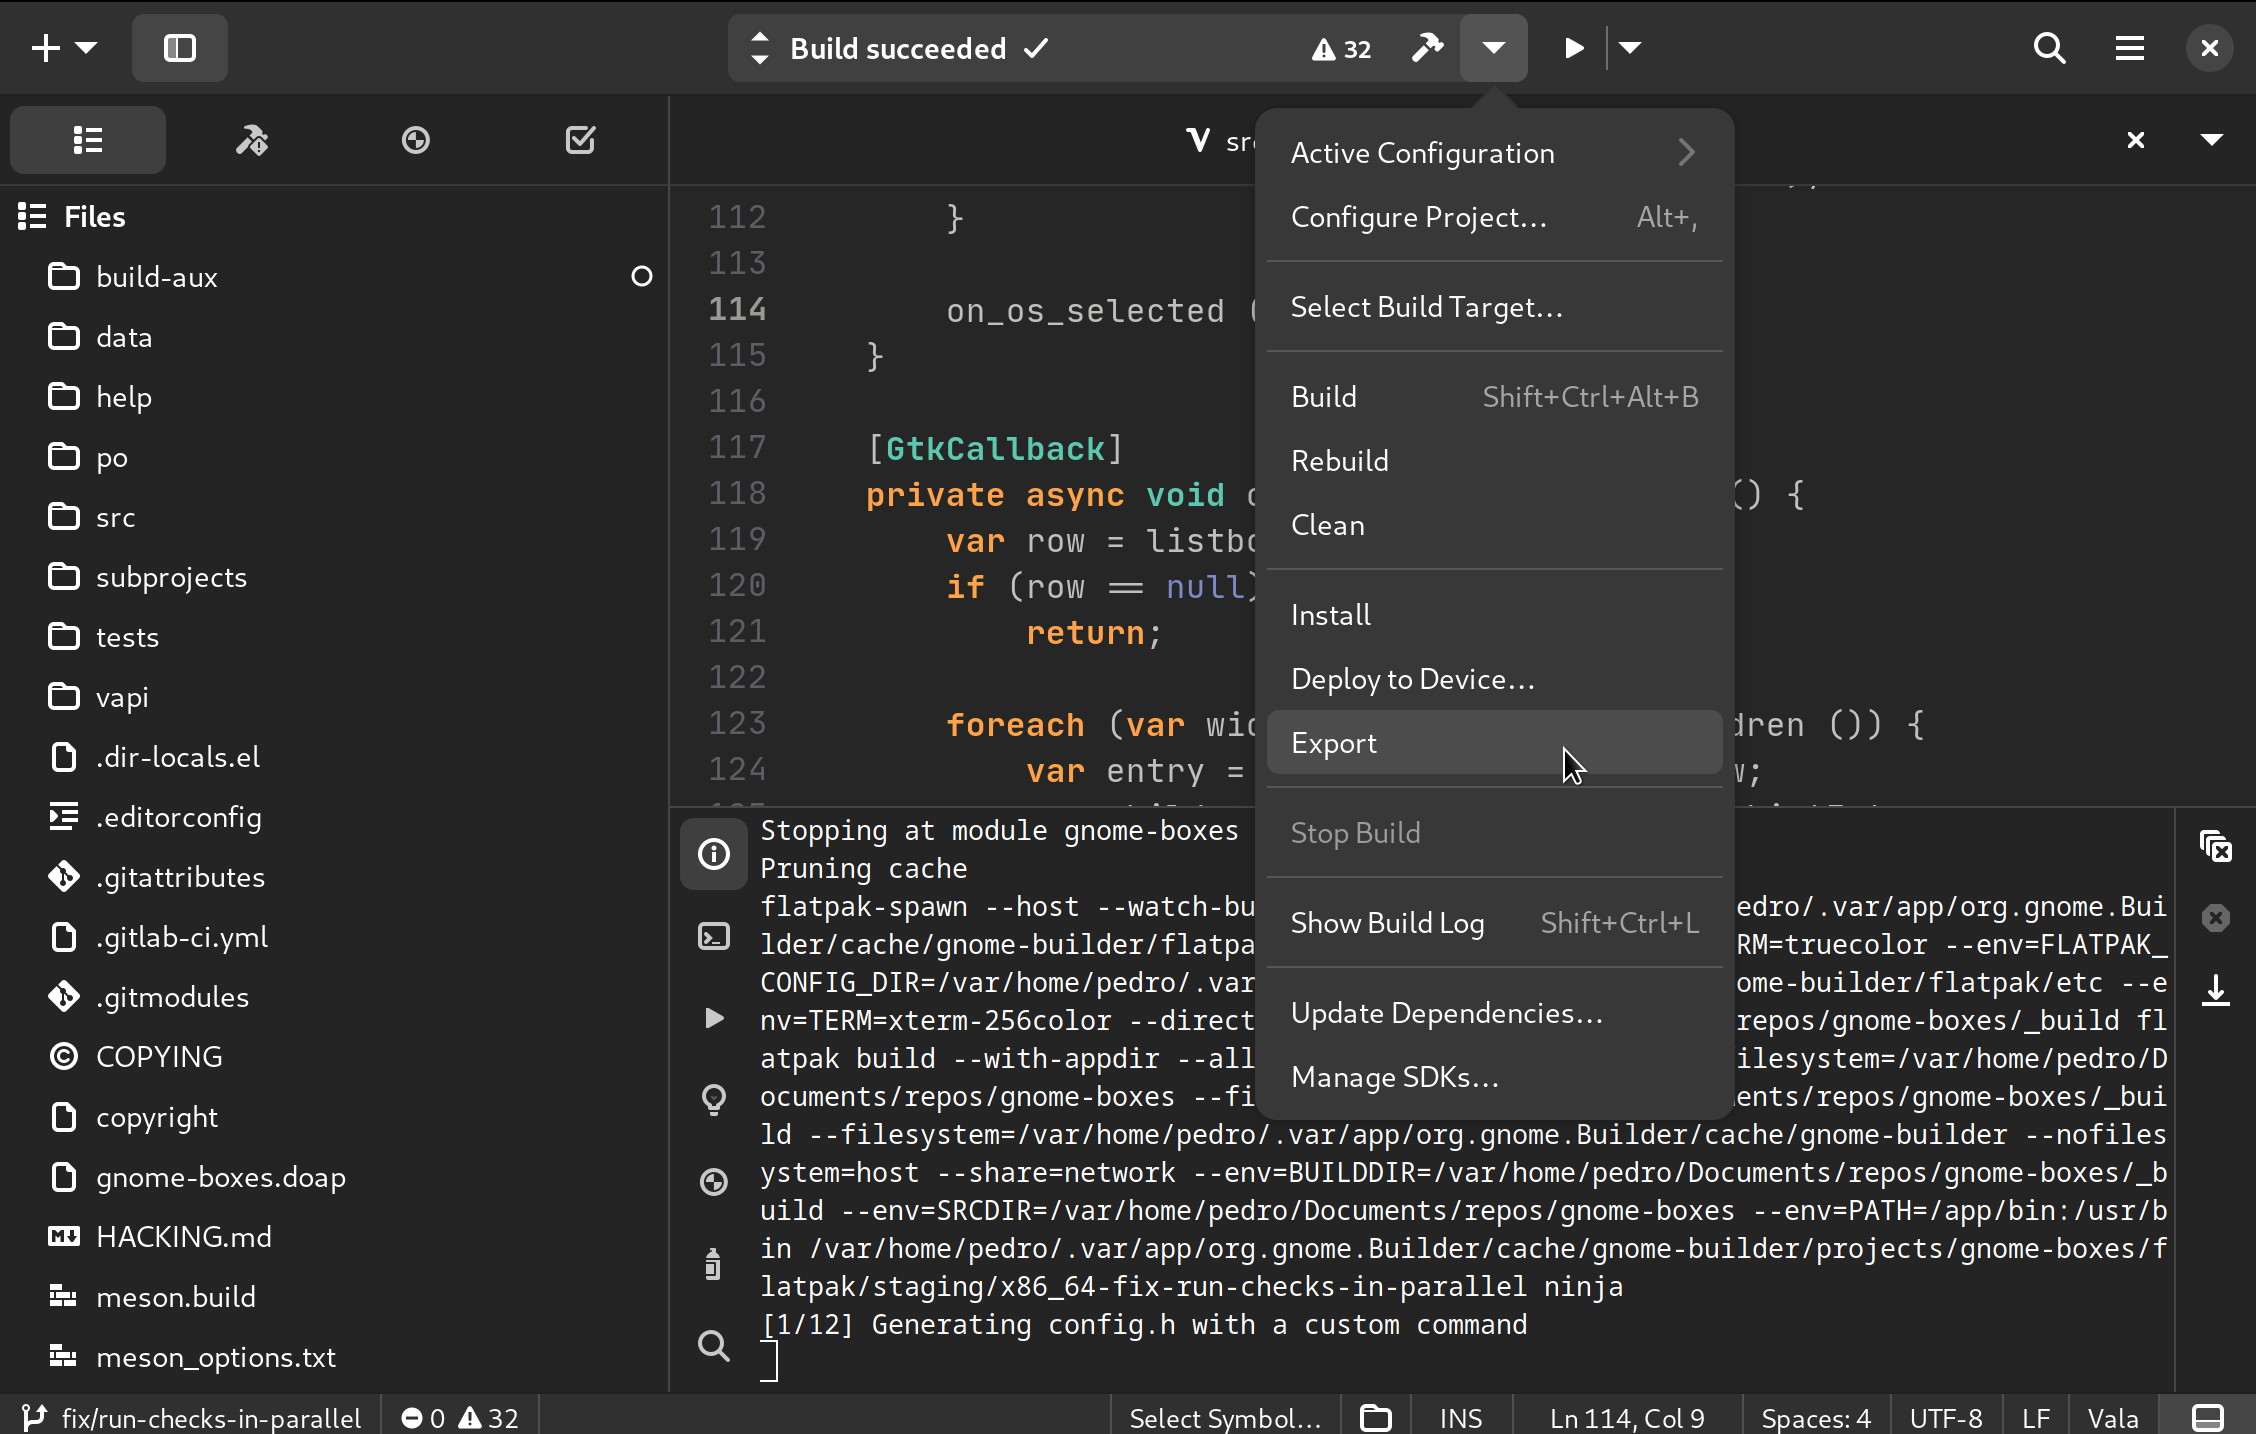
In case you need more flexibility with your custom build of Boxes (say, scripting) you’re better off exporting and installing a package. GNOME Builder makes this very easy (thanks again GNOME Builder!). First, build the application once by clicking the hammer in the omnibar. Then, click the “Export” button and wait.
Once it’s done, the file explorer will open in a directory with the exported
.flatpak package. Now, simply double-click it to install using GNOME
Software. When installation is complete, you’ll be able to access the GTK
Inspector using the first method I presented:
GTK_DEBUG=interactive flatpak run org.gnome.BoxesDevel
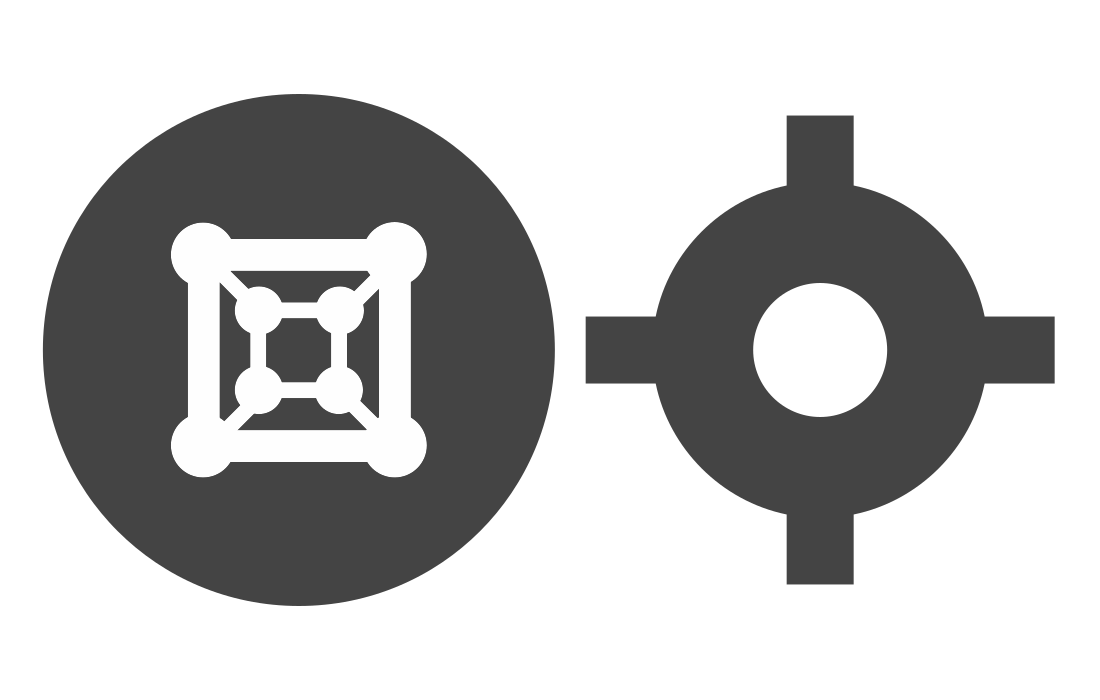
If you built the application with the project configuration described in the third method, the GTK Inspector will always launch along side your build of GNOME Boxes. In that case, you can even launch Boxes via the applications menu (its icon will be wrapped in “under construction” tape, as the one on the left side of the image).
![]()
That about covers it! While I hope this blog post becomes obsolete when someone fixes the issue of the keyboard shortcut not working (possibly myself?), I also think this was a great opportunity to learn more about flatpak and GNOME Builder.
See you in the next one!
Published on April 2, 2023.