
Safely building and running GNOME Settings with toolbx
Toolbx is a utility that empowers users and developers to install software on isolated environments, drastically reducing the risk of compromising the stability of their operating system. It is also indispensable for users of immutable distros (e.g. Fedora Silverblue, Endless OS, Vanilla OS, etc) like myself.
On this blog post I’ll share how I used toolbx to safely build and run GNOME Settings.
Step 0: backup all your settings
The isolation provided by toolbx only applies to system directories (those
that you need sudo to make changes to). That means your $HOME directory is
as vulnerable to mishaps as it is outside of the toolbx!
Since your preferences are stored within your $HOME directory make sure you
back them up before meddling with an unstable version of the GNOME Settings
app. To make the backup run:
dconf dump / > $HOME/preferences_backup.ini
Again, since your $HOME directory is not safer inside a toolbx, move that
file somewhere else (e.g. a USB stick, a trusted cloud storage provider, etc).
To restore the backup file, move it back to your $HOME directory and run:
dconf load -f / < $HOME/preferences_backup.ini
Step 1: choose the right toolbx image
To choose the operating system that will run on our toolbx, you need to pick
its base image. To figure that out, take a look at the .gitlab-ci.yml:
.fedora.container.common:
  # ...
  tags: [ crun ]
  variables:
    # ...
    FDO_DISTRIBUTION_TAG: '2023-03-14.0-main'
    FDO_DISTRIBUTION_VERSION: rawhide
Looks like GNOME Settings is targetting Fedora Rawhide, which is a rolling build of Fedora that has the purpose of testing software for upcoming releases. That said, you can create your toolbx with the following command:
toolbox create gnome-control-center --image registry.fedoraproject.org/fedora-toolbox:rawhide
If you are doing this for the first time, this command will download the Fedora Rawhide toolbx image. It will take some time and some storage (500Mb) but don’t worry it’ll be worth it! Once the toolbx is created, enter it with:
toolbox enter gnome-control-center
Step 2: installing dependencies
To install the dependencies needed to build GNOME Settings, simply run:
sudo dnf builddep gnome-control-center
Step 3: building and running
Finally, head to the root of its repository and run:
make _build && ninja -C _build
This will build GNOME Settings at ./_build/shell/gnome-control-center.
Step 4: taking advantage of the isolation
To run the executable file, you can leave the toolbx and execute like so:
exit
./_build/shell/gnome-control-center
However, you may want to run it inside your toolbx! If that’s the case, you also have to install your local build of GNOME Settings. To do that, run:
ninja -C _build install
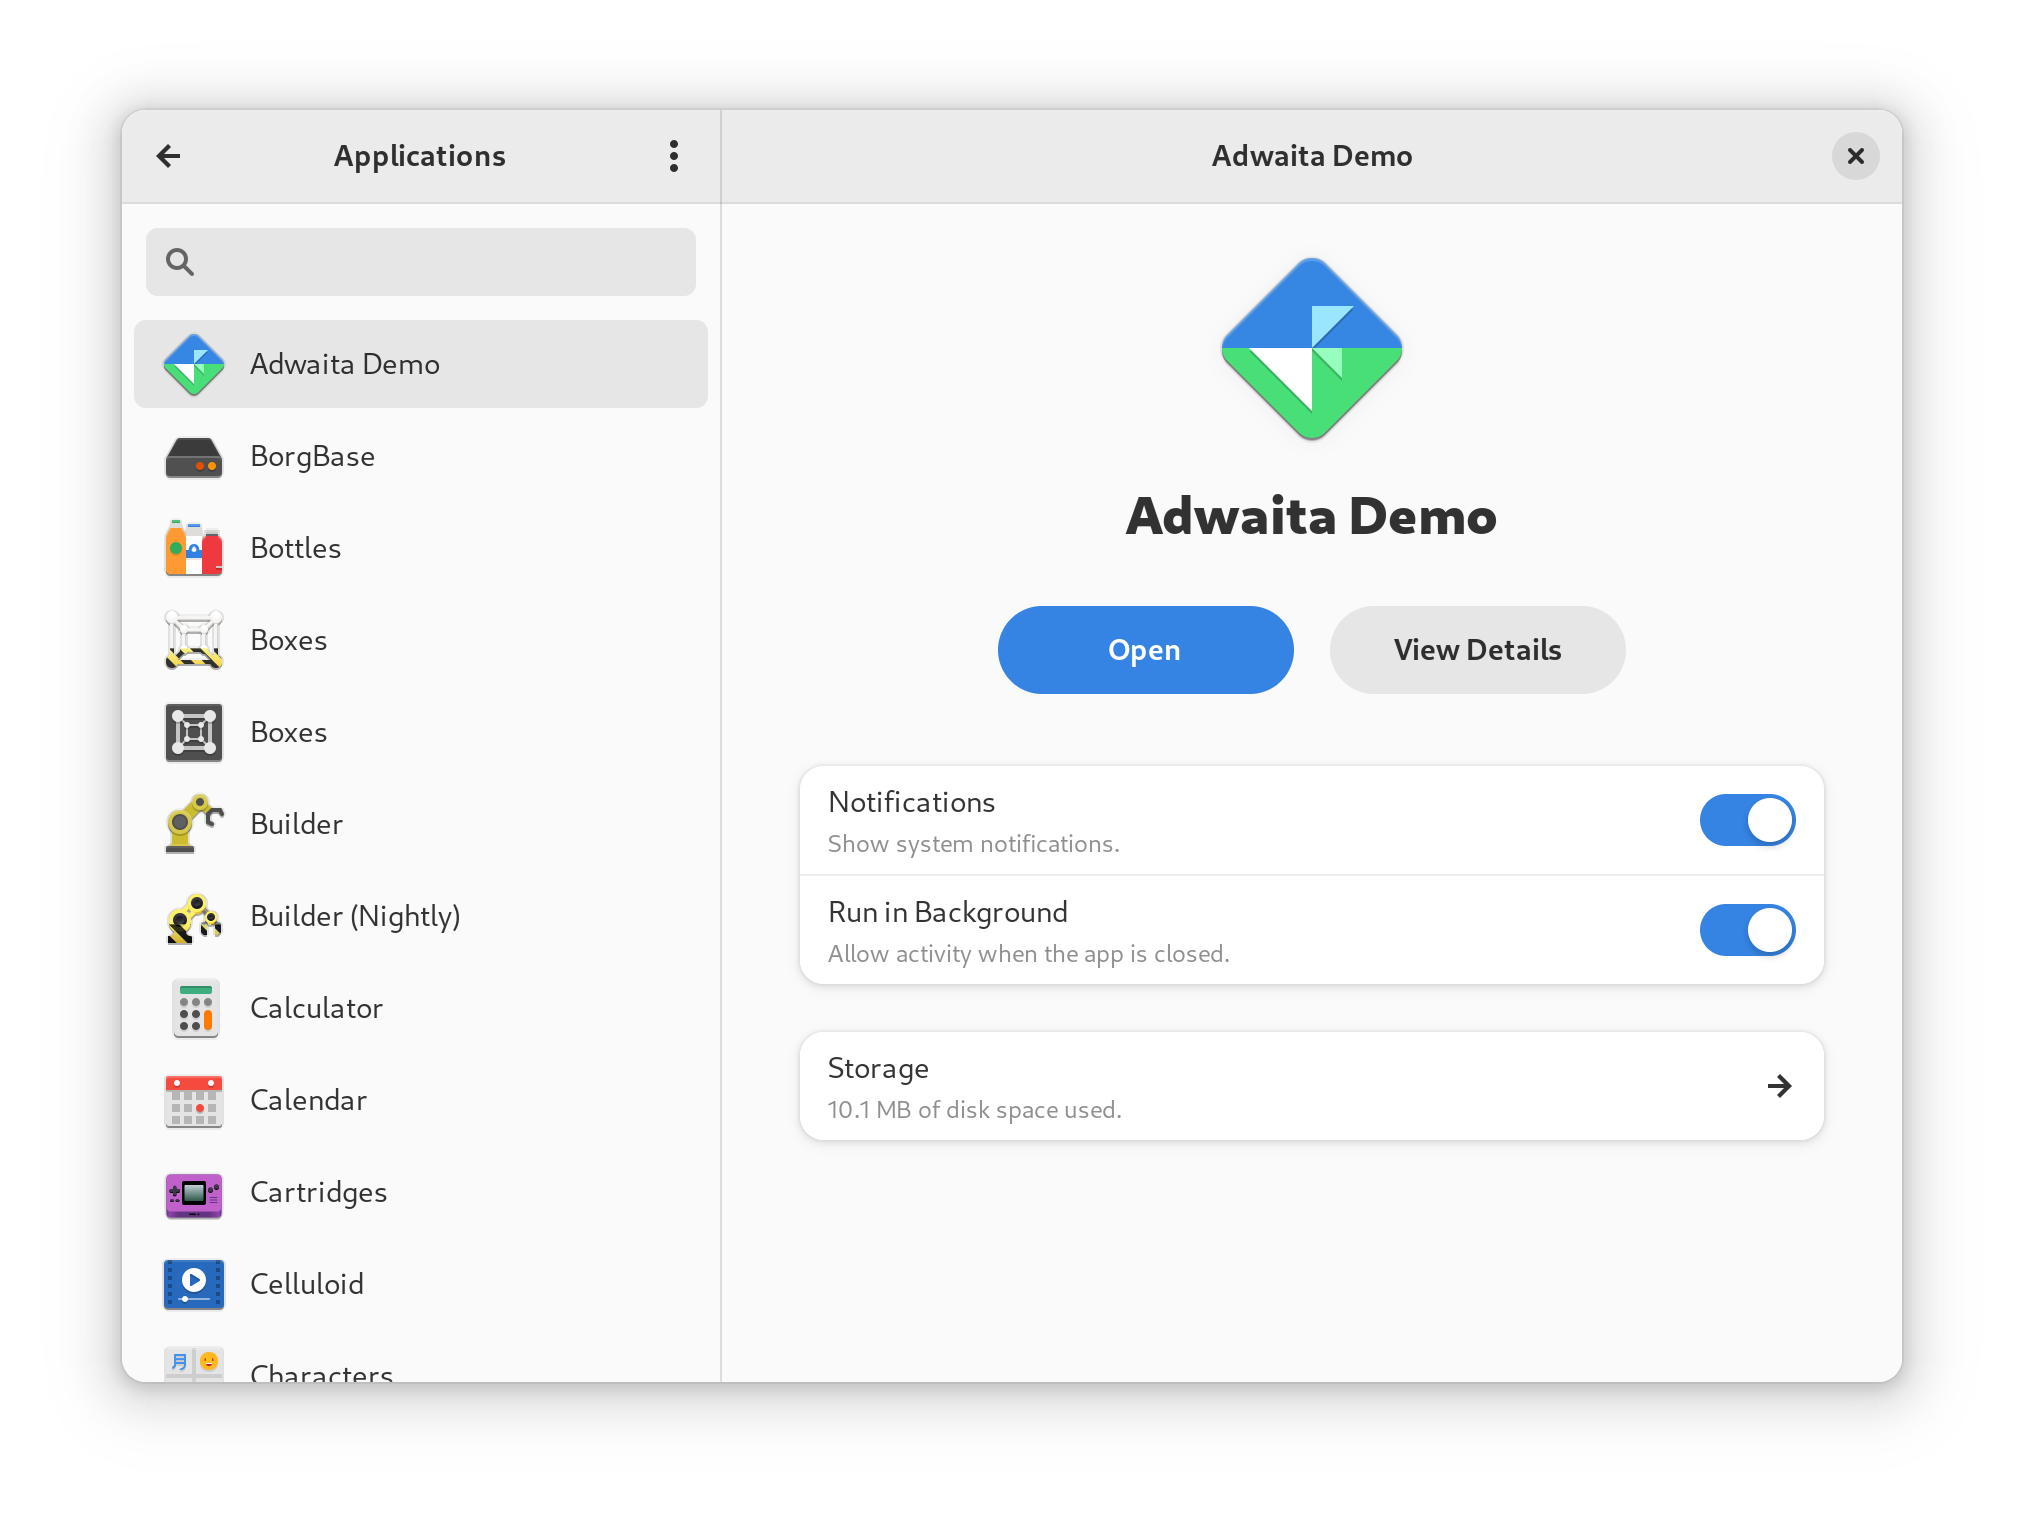
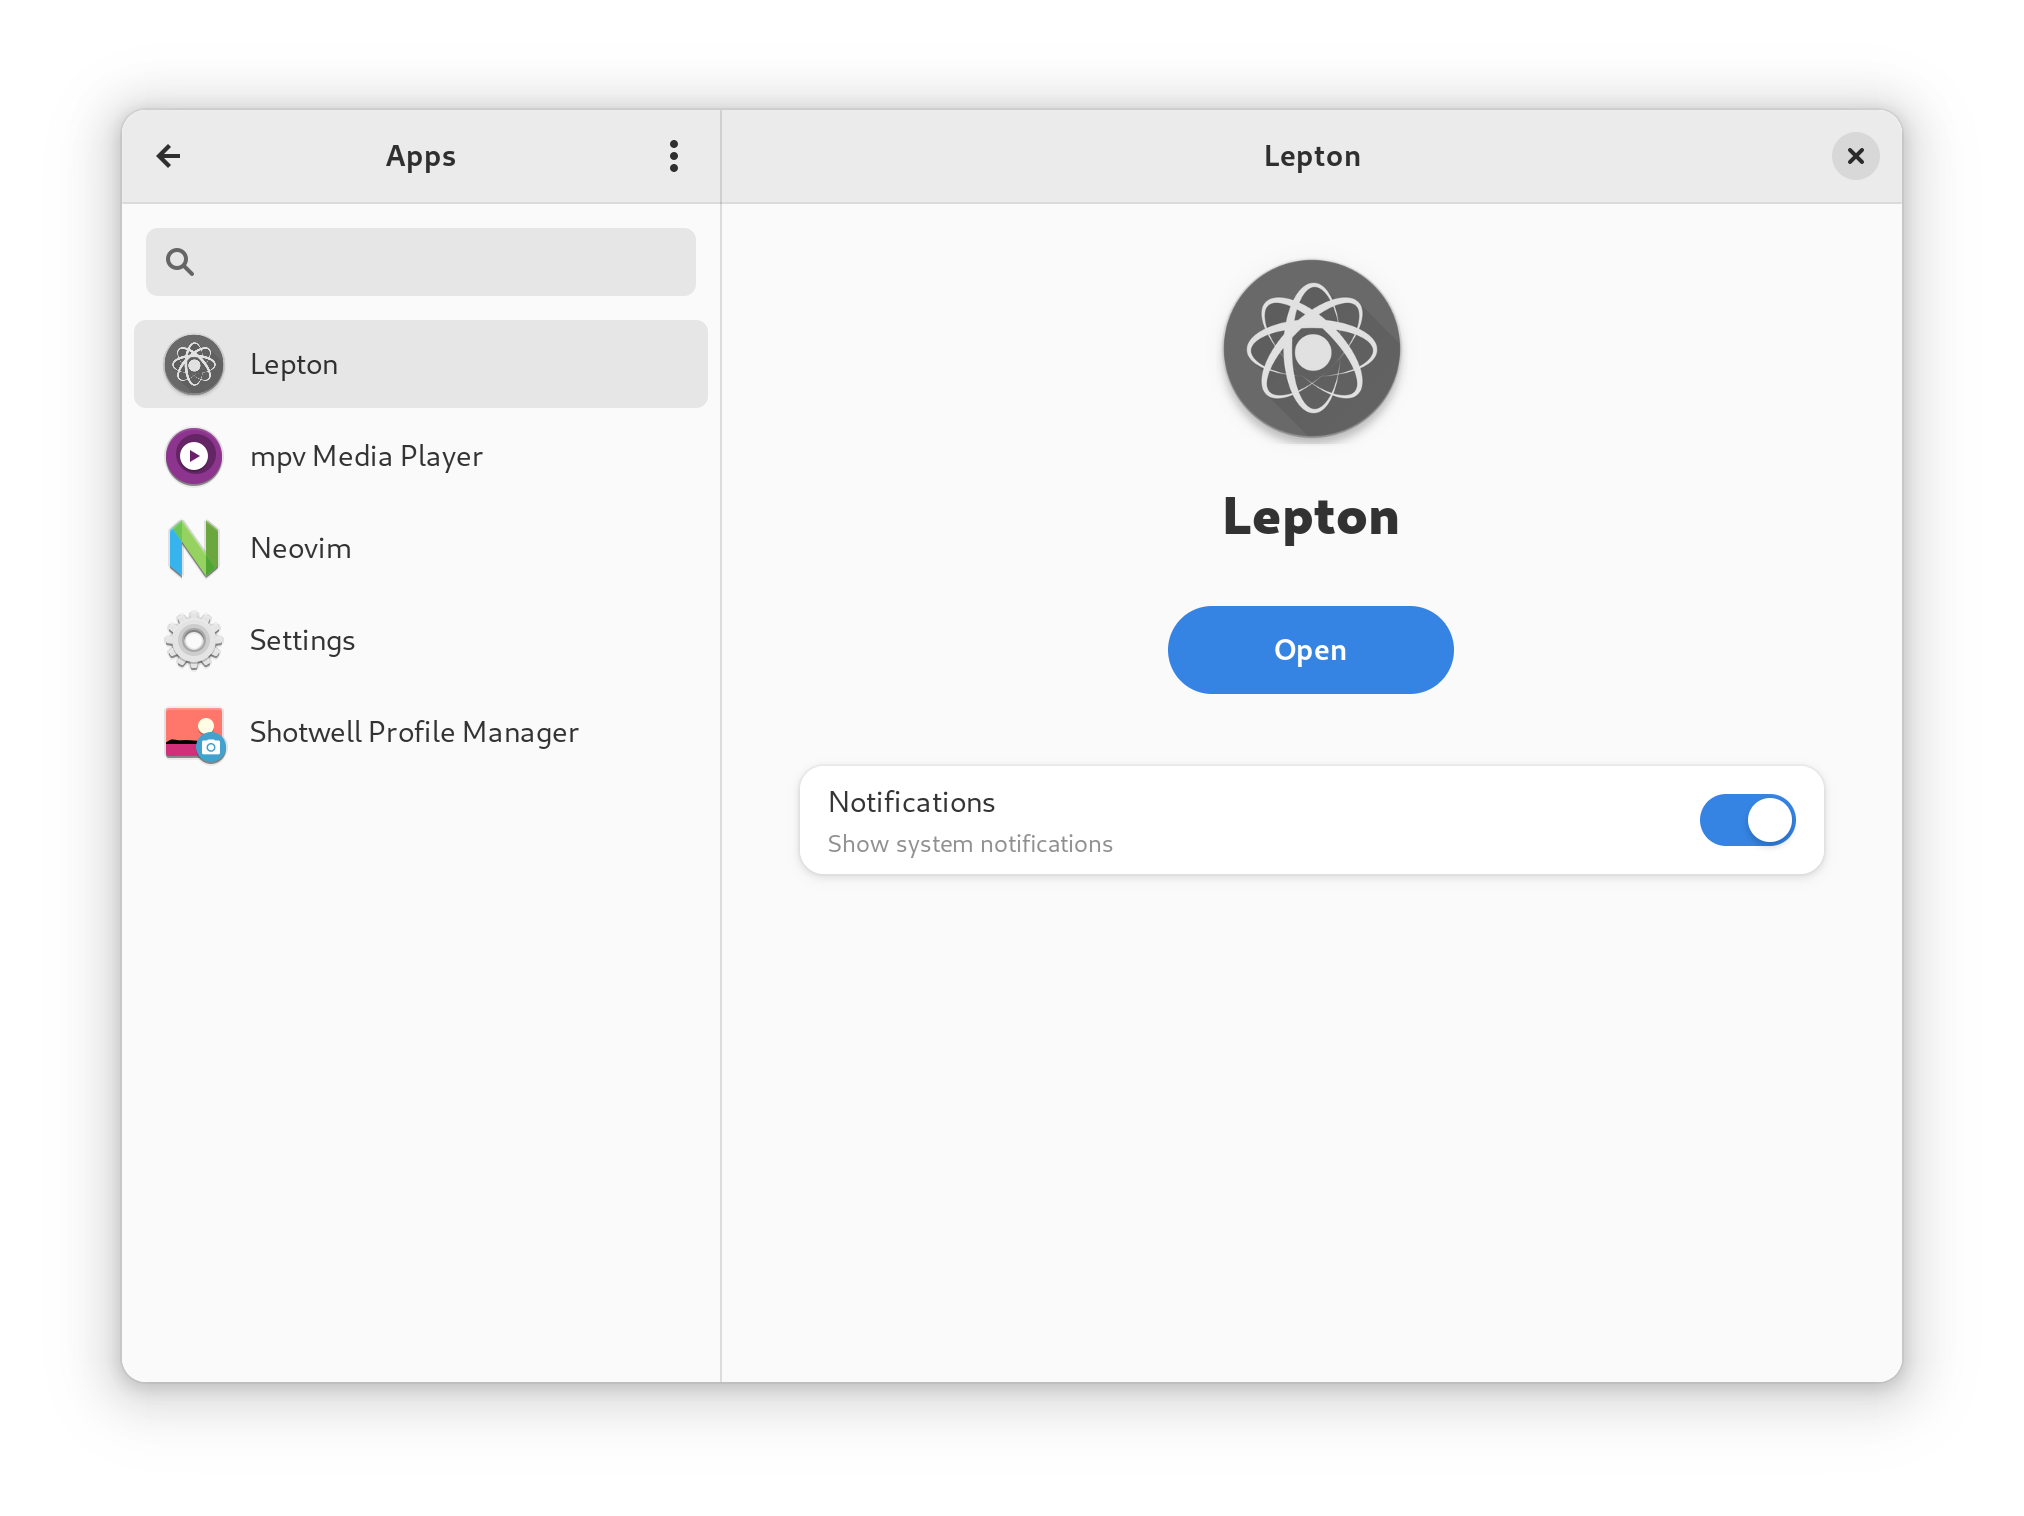
This will allow you to take advantage of the isolated environment provided by toolbx! For instance, when was writing this contribution to the applications panel, I wanted to test a few apps that I didn’t have (nor wanted to have) installed on my system. To address that, I installed a few applications inside my development toolbx! As you can see, the Settings app lists different applications when I open it from inside or from outside of the toolbx:
| Outside toolbx | Inside toolbx |
|---|---|
|
|
That’s all! Hope this was useful for you!
Credit
This post is a personal take on the GNOME Settings’ own guide on building with toolbx.
Published on April 3, 2023.